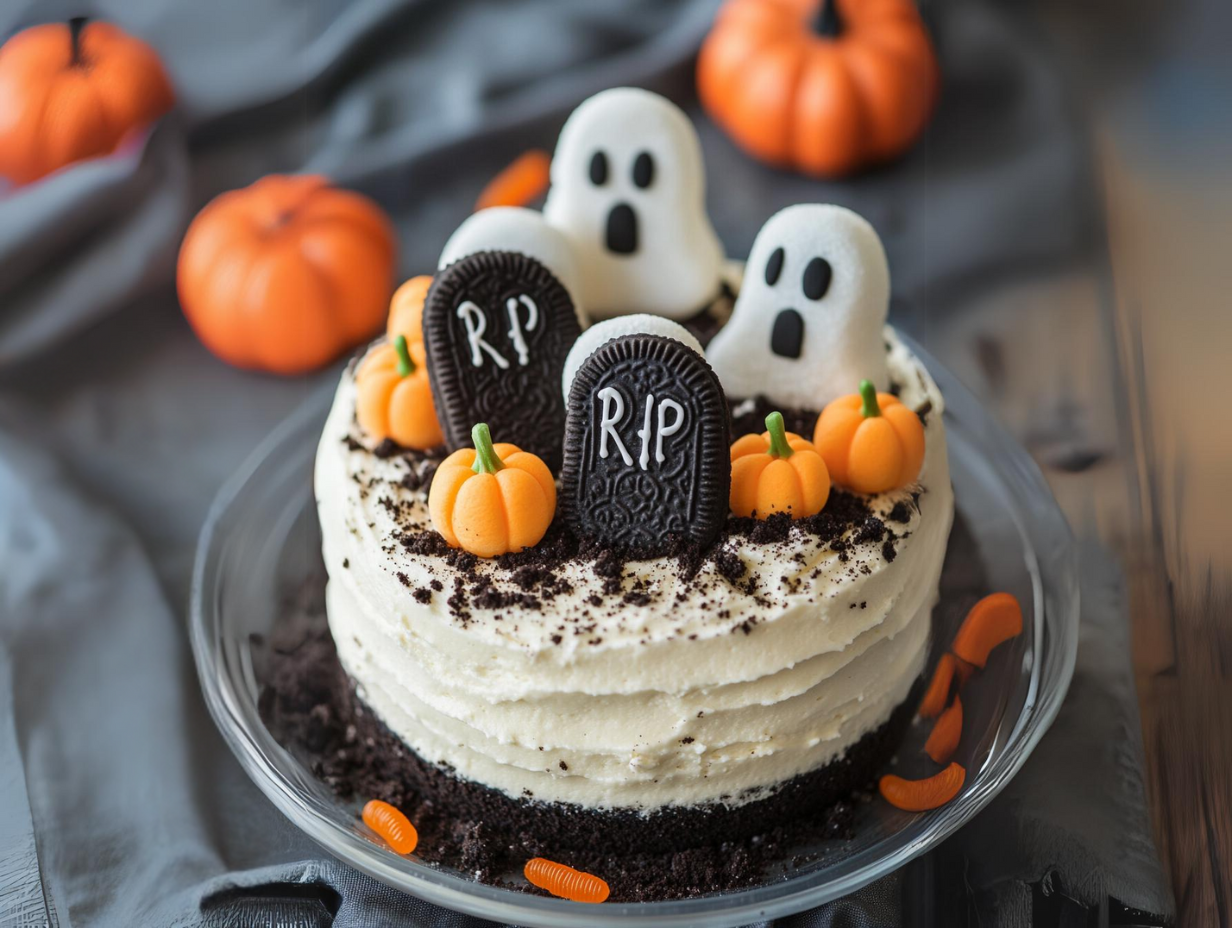
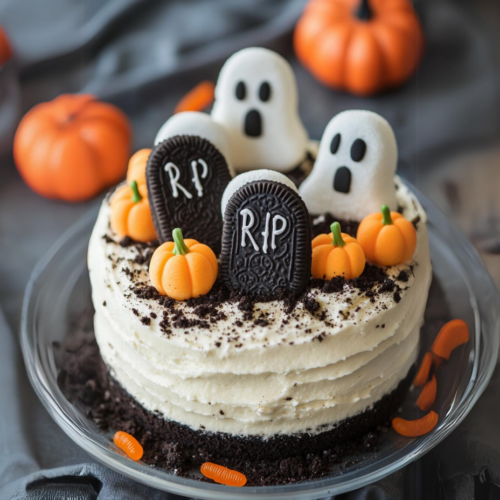
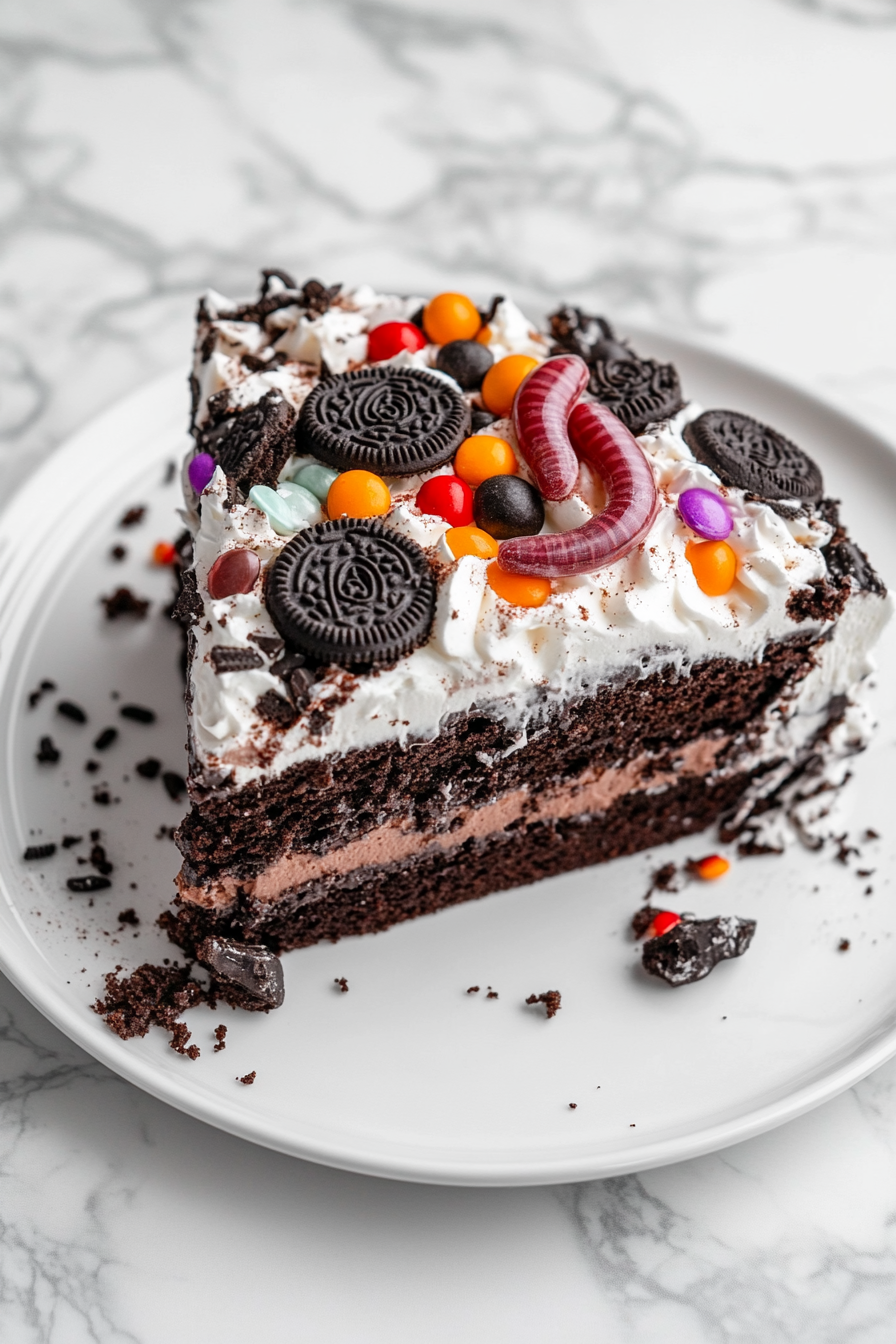
Halloween Dirt Cake is the perfect treat for spooky season! With its layers of creamy chocolate pudding, crushed cookies, and a bit of eerie decoration, this dessert is as fun to make as it is to eat.
It’s a playful twist on the classic dirt cake but made Halloween-ready with creepy crawly gummy worms, tombstones, and maybe even a few candy eyeballs peeking through the “dirt.” This cake is a crowd-pleaser, and its no-bake simplicity makes it a fantastic option for busy families or last-minute Halloween parties.
What makes this dirt cake stand out is how customizable it is. Whether you want to go all out with spooky decorations or keep it simple and let the kids have fun assembling their own mini portions, there’s room to get creative.
This Halloween Dirt Cake is not only trending for its whimsical, creepy appearance but also for being easy enough that even the littlest ghosts and goblins can help put it together. Plus, no oven required!
Halloween Dirt Cake Recipe
Equipment
- 13×9-inch baking dish
- Large mixing bowl
- Hand mixer or stand mixer
- Whisk
- Spatula
- Parchment paper
- Microwave-safe bowls (for melting chocolate)
- Ziploc bag (for piping)
- Measuring cups and spoons
- Spoon or offset spatula (for spreading layers)
Ingredients
- 1 package Oreo cookies crushed (15.5 oz)
- ¼ cup unsalted butter softened
- 1 package cream cheese softened (8 oz)
- ¾ cup powdered sugar
- 2 ¾ cups milk
- 2 boxes instant chocolate pudding mix 3.4 oz each
- 12 oz Cool Whip thawed
For the Graveyard Decoration:
- 12 Nutter Butter cookies
- 10 oz Ghirardelli white chocolate melting wafers
- 1 cup assorted candy corn and pumpkins
- ¼ cup melted Ghirardelli chocolate wafers for writing “RIP”
Instructions
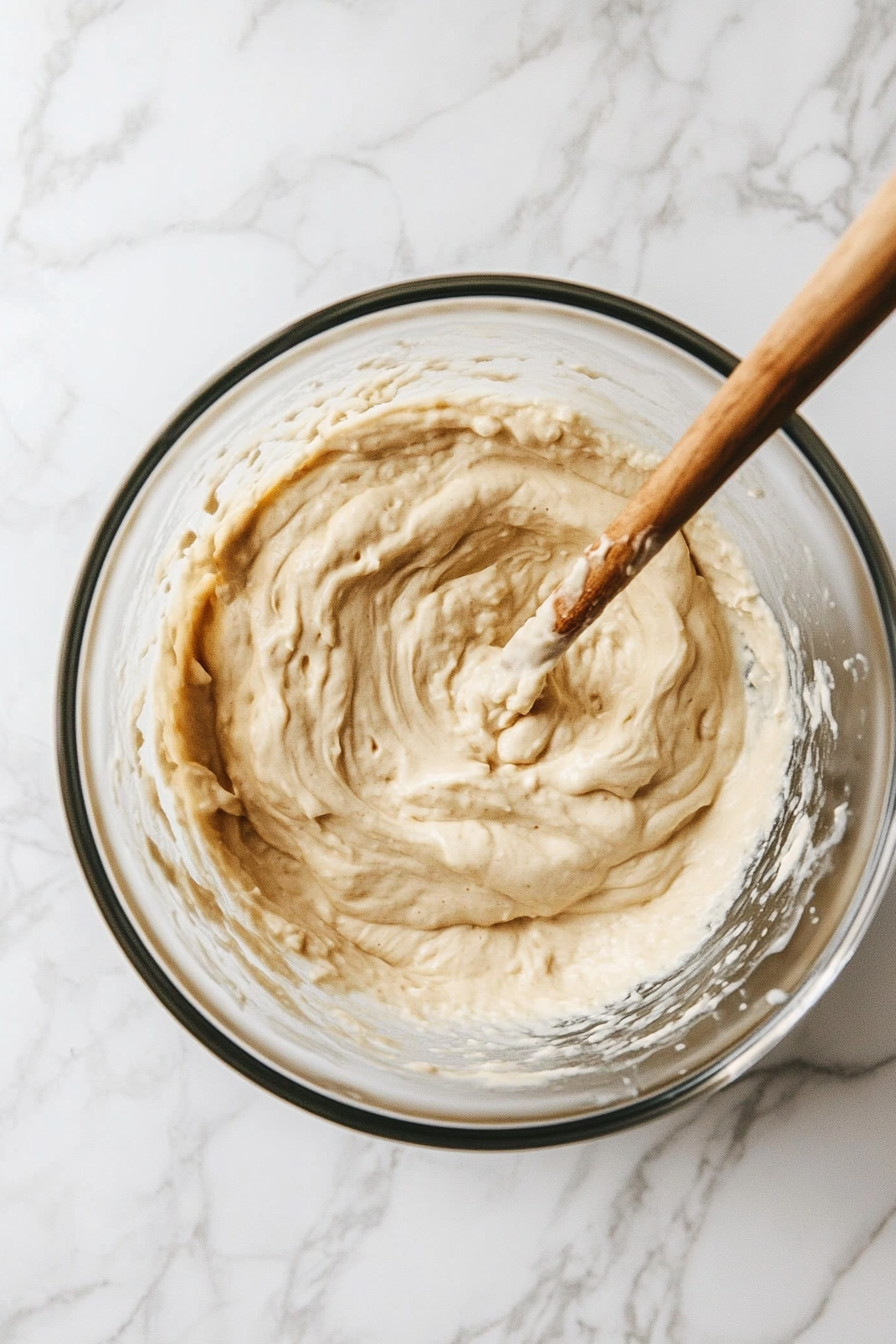
- Prepare the Cream Cheese Mixture: In a large bowl, beat together the butter, cream cheese, and powdered sugar until fluffy. Set aside.
- Make the Pudding: In a separate bowl, whisk the milk with the instant chocolate pudding mix until smooth and no lumps remain. Let it sit for 2 minutes to thicken slightly.
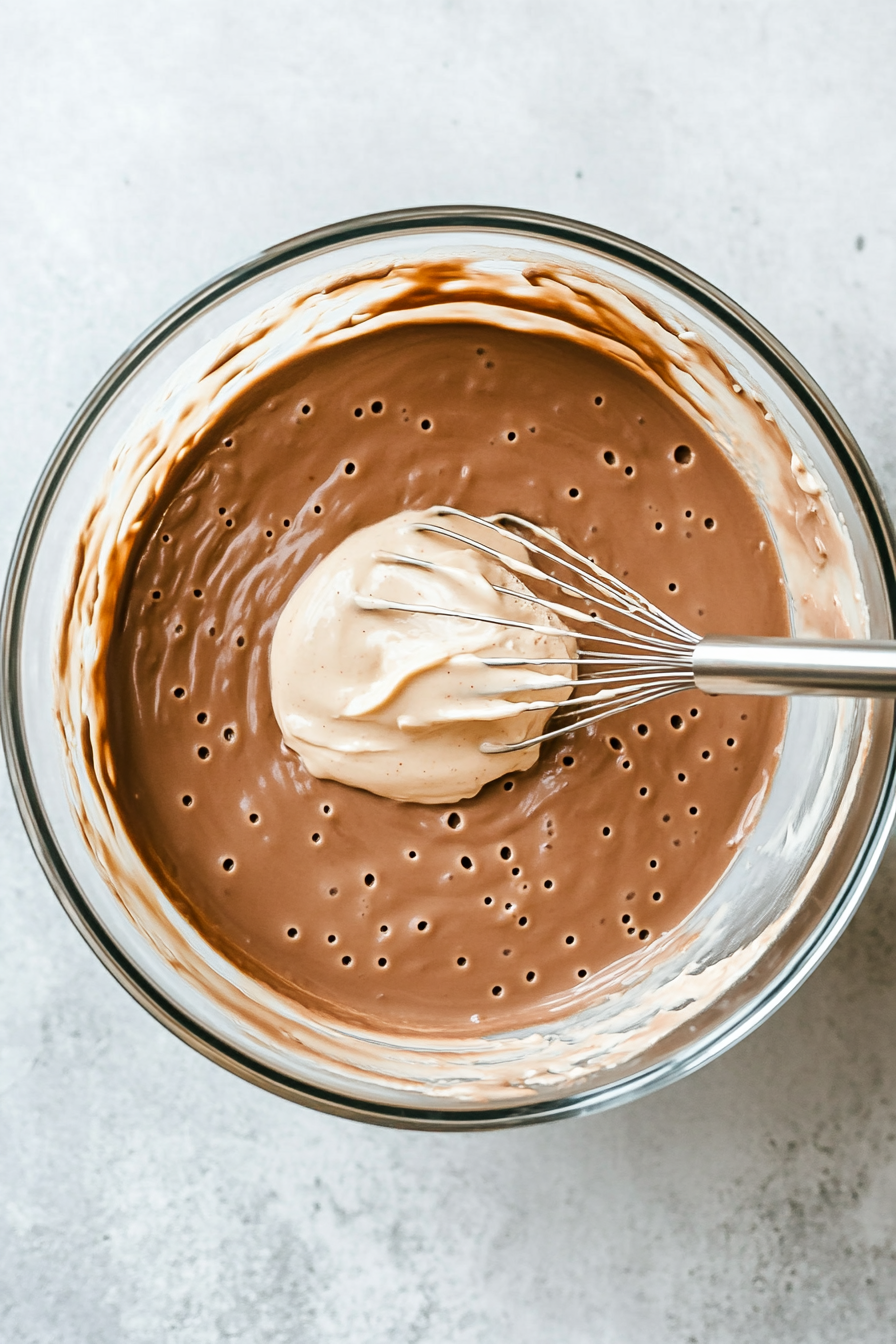
- Combine Mixtures: Pour the pudding mixture into the cream cheese mixture. Beat until well blended, scraping down the sides of the bowl as needed. Fold in the Cool Whip until fully incorporated.
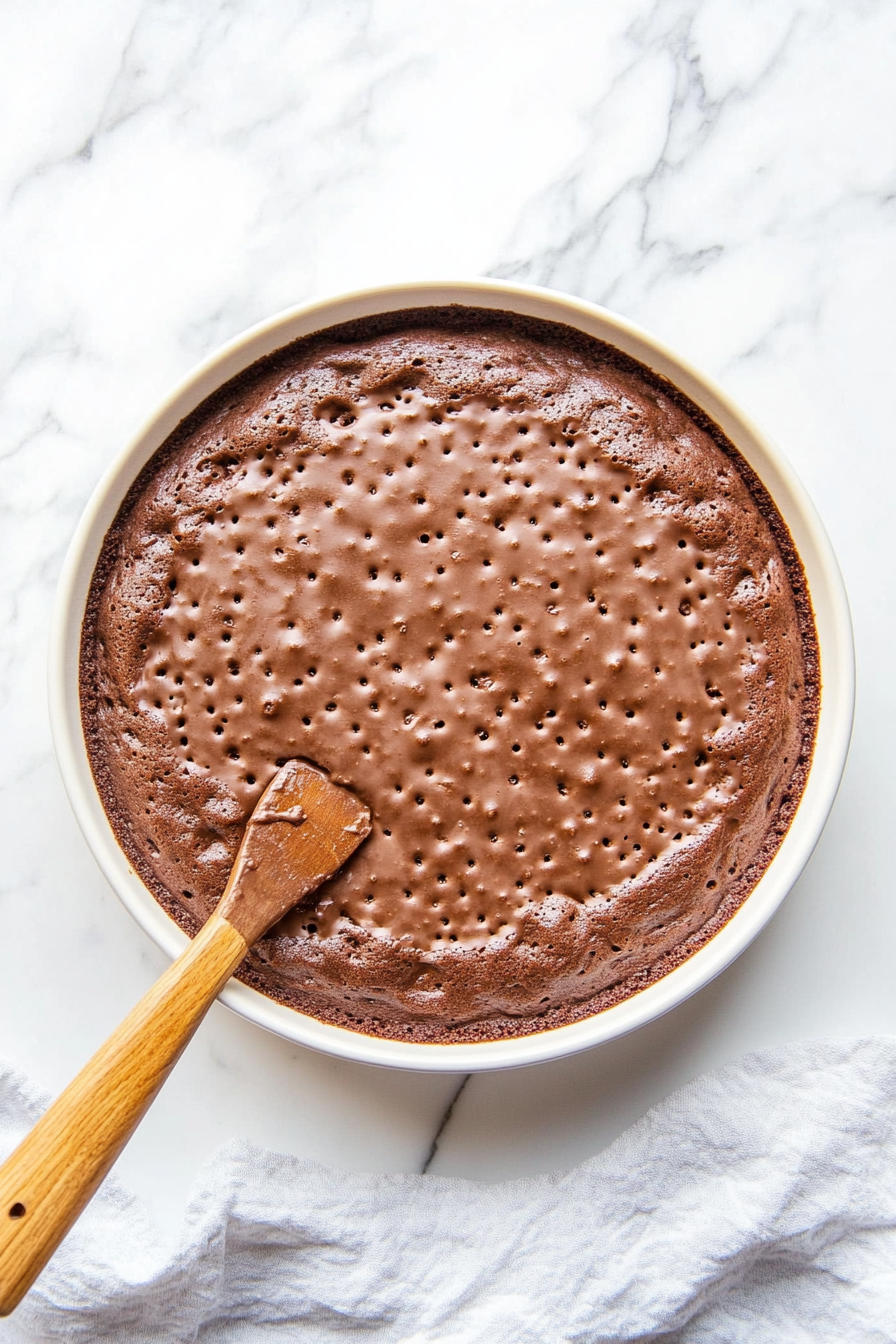
- Assemble the Cake: In a 13 x 9-inch dish, spread half of the crushed Oreos evenly over the bottom. Pour the pudding filling on top, then sprinkle the remaining Oreos over the filling. Refrigerate for at least 2 hours to set.
- Create the Tombstones: Melt the white chocolate wafers according to the package instructions. Dip each Nutter Butter cookie into the white chocolate, covering almost the entire cookie. Lay them on parchment paper and allow them to set.
- Add the RIP Writing: Melt the chocolate wafers and transfer the melted chocolate into a small Ziploc bag. Snip off a tiny corner of the bag and pipe “RIP” onto each white chocolate-dipped Nutter Butter.
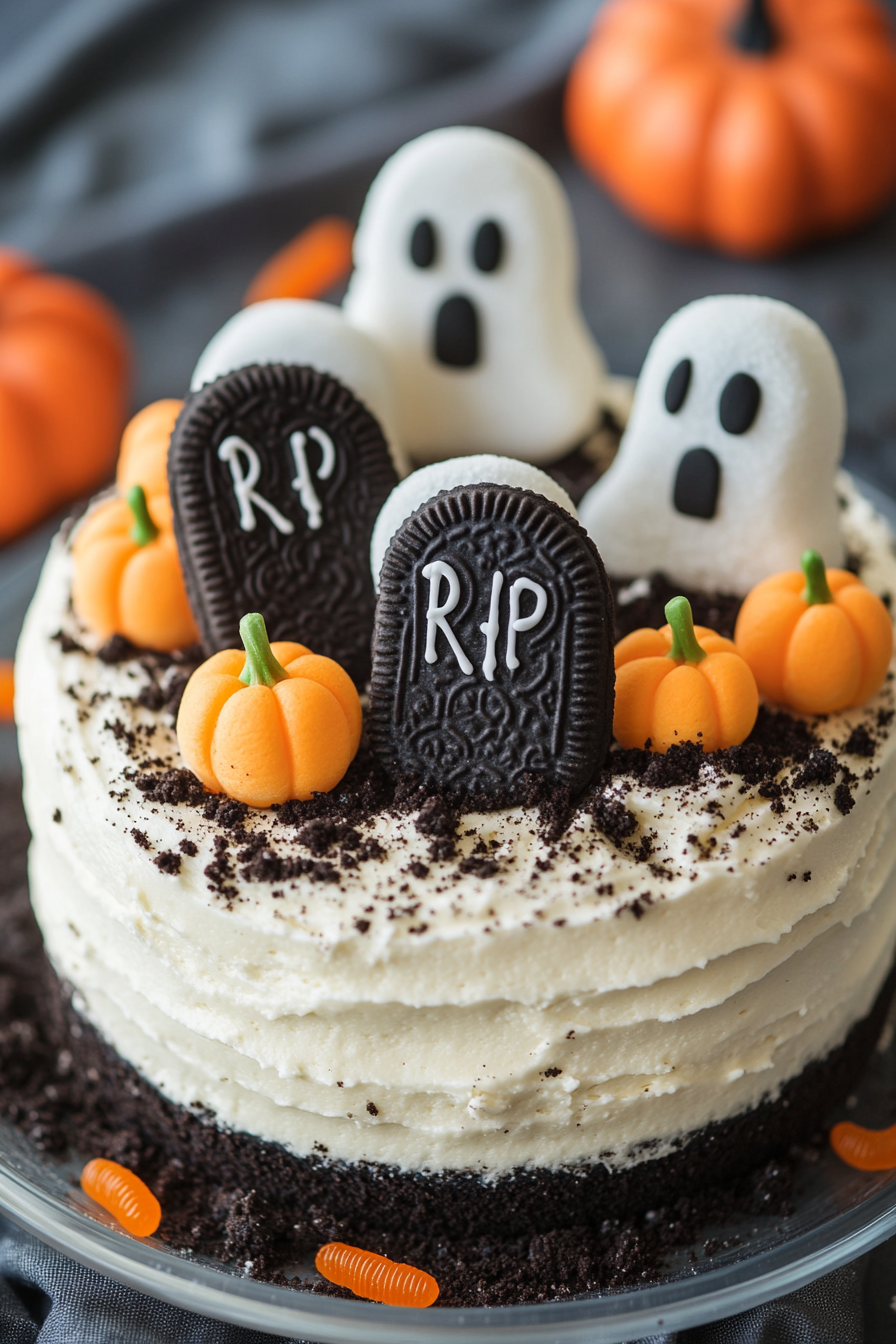
- Decorate the Graveyard Scene: Once the tombstones are set, arrange them on top of the dirt pudding cake. Scatter candy corn and pumpkins around to create a spooky graveyard effect.
Serve and Enjoy:
- Serve this creative dessert and enjoy the eerie but delicious fun!
Notes
Be sure to assemble the graveyard scene just before serving to keep the cookies crunchy.
Nutrition Value
| Nutrition | Value |
|---|---|
| Calories | 412 kcal |
| Carbohydrates | 57g |
| Protein | 4g |
| Vitamin A | IU |
| Vitamin C | mg |
| Iron | mg |
| Sugar | 40 g |
| Calcium | mg |
Get My Tips for Success!
- Try different flavors: While I usually make this with traditional Oreos and chocolate pudding, you can easily switch things up. Use Golden Oreos and vanilla pudding for a new twist.
- Make ahead: This cake stays fresh in the fridge for up to a week, so you can make it in advance to save time on party day. Just wait to decorate until you’re ready to serve.
- Crush the cookies easily: If you don’t have a food processor, put the cookies in a ziplock bag, seal it, and use a rolling pin or spoon to crush them.
- Use the right pan: A 9×13 baking dish works best for this recipe. A dish with a lid is especially convenient if you’re taking it to a party.
- Use disposable pans: If you’re bringing the cake to a party or cookout, consider using a disposable pan—no need to worry about getting it back.
- Make individual servings: For a fun, kid-friendly option, serve the dirt cake in clear plastic cups instead of one big dish.
This version keeps it simple and clear while maintaining all the useful tips!