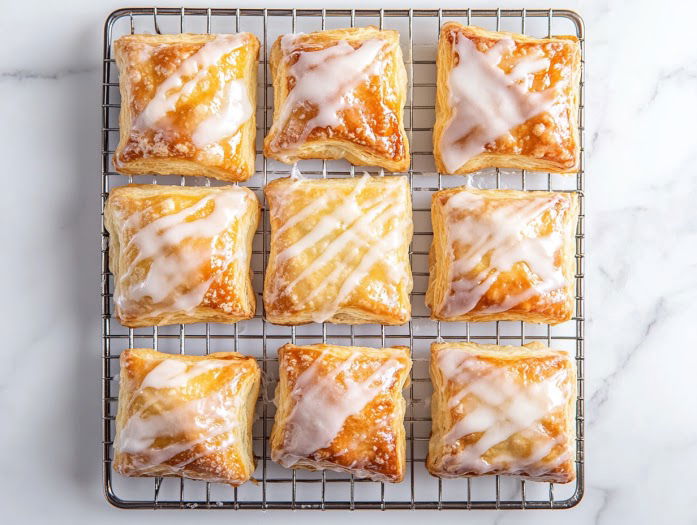
The first time I tried making a cheese Danish at home, I was hooked. There’s just something magical about the combination of buttery, flaky pastry and creamy, sweet cheese filling that draws you in with every bite.
As the aroma of warm, golden dough fills the kitchen, you’ll already be planning your second helping. This version keeps things simple with a few store-bought ingredients, but the end result is anything but ordinary. The key to making it truly unforgettable? A touch of vanilla and lemon zest in the filling for an extra layer of brightness that perfectly balances the richness.
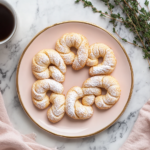
And while cheese danishes are often enjoyed as a breakfast pastry, they also pair wonderfully with a mid-afternoon treat like Fruit Salad With Whipped Cream and Fruit Salad.
Give this recipe a try, and you’ll see how easily it fits into any weekend baking project. Whether you enjoy it fresh from the oven or save a few for the next day, these danishes are sure to disappear quickly. Share your twists or favorite fillings in the comments!
Why I Love This Recipe?
- Bakery-Style Indulgence at Home– The combination of flaky pastry and creamy filling makes for an irresistible treat that feels like a bakery indulgence—but at home.
- Quick and Easy with Pre-Made Dough– The use of pre-made dough saves time, making this recipe surprisingly quick and easy while still delivering amazing flavor.
- A Zesty Twist on Classic Sweetness– A touch of lemon zest elevates the sweetness of the cheese filling, making it taste fresh and bright.
- Versatile for Any Craving– These danishes are incredibly versatile—you can easily swap out the cheese for fruit or chocolate to suit your cravings.
Cheese Danish
Equipment
- Baking sheet
- Hand Mixer
- Mixing bowls
- Wire cooling racks
Ingredients
Icing
- ¼ tsp vanilla extract
- ½ cup powdered sugar
- 2 tbsp milk
Cheese Danish
- 1 tsp vanilla extract
- 1 egg, yolk and white separated
- 1 pinch salt
- 1 sheet puff pastry, thawed
- ⅓ cup powdered sugar
- 8 oz cream cheese softened
Instructions
- Preheat your oven to 400°F and position the oven rack in the center.
- Line a baking sheet with parchment paper for easy cleanup.
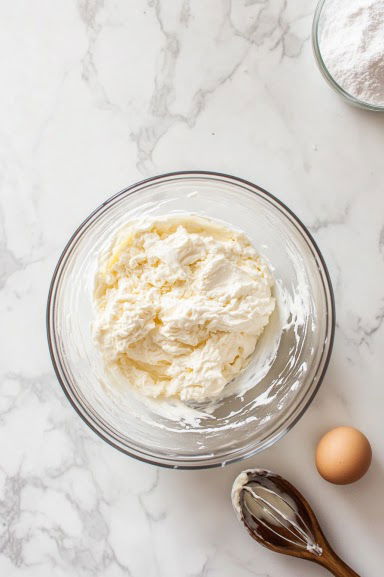
- In a bowl, whisk together cream cheese, powdered sugar, vanilla extract, egg yolk, and a pinch of salt until smooth and fluffy.
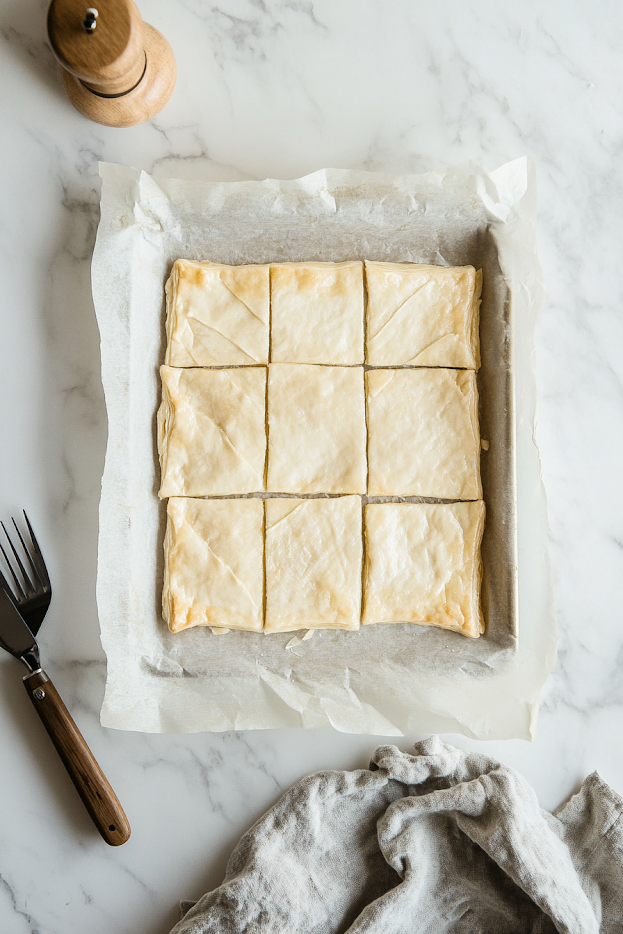
- Roll out your puff pastry sheet on the baking sheet, brushing off any extra flour.
- Cut the pastry along the natural folds to make three strips, then slice each strip in half to create six even pieces.
- Using a fork, prick the edges of each puff pastry rectangle, leaving about a half-inch border around the sides.
- Using a fork, prick the edges of each puff pastry rectangle, leaving about a half-inch border around the sides.
- This step helps prevent the center from puffing up too much.
- Spoon about two heaping tablespoons of the cream cheese mixture into the center of each pastry square.
- Spoon about two heaping tablespoons of the cream cheese mixture into the center of each pastry square.
- Spread it evenly while keeping the edges clear.
- Beat the egg white until frothy, then lightly brush it along the borders of the pastries to ensure a golden, shiny finish when baked.
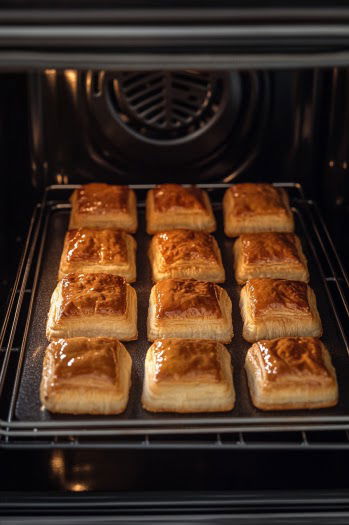
- Bake the pastries for 10 minutes, then rotate the baking sheet for even browning.
- Continue baking for an additional 5-10 minutes, or until the edges are puffed and golden.
- Remove the pastries from the oven and transfer them to a cooling rack using a spatula.
- Allow them to cool.
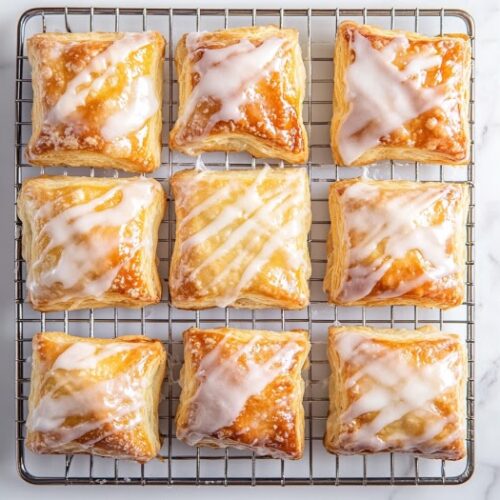
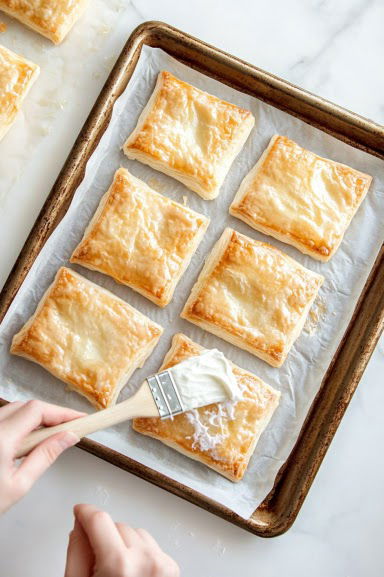
- While the danishes cool, whisk together powdered sugar, vanilla extract, and milk to create a smooth glaze.
- Drizzle this over the cooled pastries.
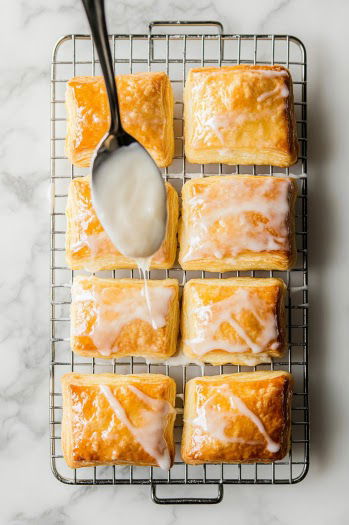
- For an optional fruity twist, you can also drizzle with strawberry jam thinned with a little water.
Notes
- Ensure the cream cheese is at room temperature to achieve a smooth, lump-free filling.
- If the glaze is too thick, add a little more milk until you get a drizzling consistency.
| Nutrition | Value |
|---|---|
| Calories | 438 kcal |
| Carbohydrates | 38 g |
| Protein | 6 g |