Today I wanted to bring to you a No Bake Cake with a summer flair! No bake cakes are the answer when you are looking to make a sweet treat, but the thought of turning on the oven in the summer heat, has me giving it a thumbs down! So, I thought I would try a S’mores No Bake Cake! There are so many desserts that scream “summer”, but s’mores are definitely on the top of my family’s list! 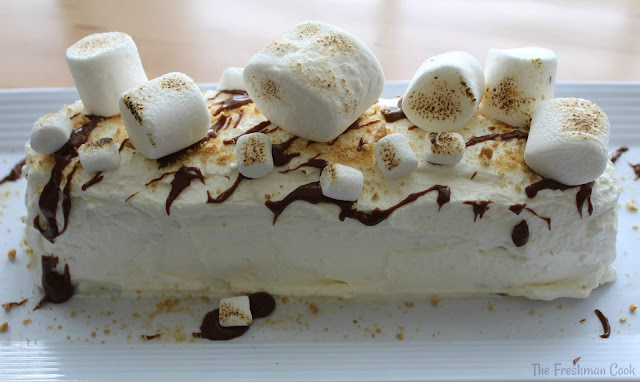
This cake needs to be made at least 24 hours before you want to serve it. It is very simple to make, because all your “baking” is done in the fridge. I used graham crackers for the cake portion of the dessert, and whipped cream for the “frosting”. While it is “cooking” in the refrigerator, the whipped cream will soften the graham crackers, making them as soft as cake! I added a chocolate ganache for the chocolate bar, and I used mini marshmallows toasted with a kitchen torch for the fun flavor!
S’mores No Bake Cake
(printable recipe at end of page) (feeds 8-10 people)
3 cups Heavy Duty Whipping Cream
4-6 tablespoons Sugar
8 Graham Crackers
12 ounces Milk Chocolate ( I use Trader Joes Belgium Chocolate Bar) It is very tasty and is priced great. Give it a try. You will love it!)
Bag of mini Marshmallows
Large and medium Marshmallows 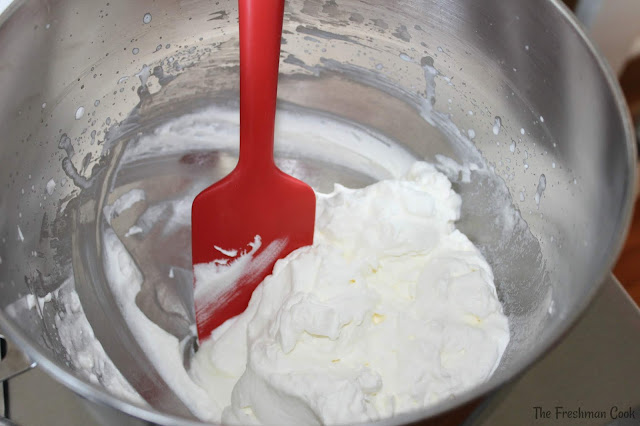 Make the whipped cream by pouring the heavy whipping cream into a large bowl. Start mixing on medium speed. As the cream starts to thicken, add the tablespoons of sugar. If you would like it less sweet, start with a small amount and then mix. Add more after tasting and mix again, if needed.
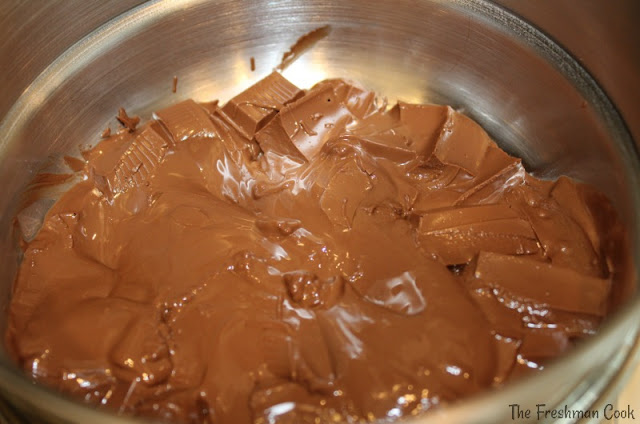 Melt the chocolate over low heat, using a double boiler. If you do not have one, you can make your own by placing chocolate into a small pot. Place some water into another pot, which should be about one size larger than the pot with the chocolate. The small pot should not touch the water in the bottom pot, but it needs to allow the heat from very low temperature to melt the chocolate. After the chocolate is melted, heat some heavy duty whipping cream in a separate pan or the microwave. Add the heated cream to the melted chocolate, stirring the chocolate and cream together, creating a chocolate ganache.
Use a plate to build the cake on that you can also use as a serving platter. It is much easier for you. Moving the finished cake could be a problem. Spread whipped cream on one side of two graham crackers. Place them on a plate, whipped cream side down on the plate. This will help stabilize the graham crackers.
 Spread the melted chocolate on to the top of the graham crackers.
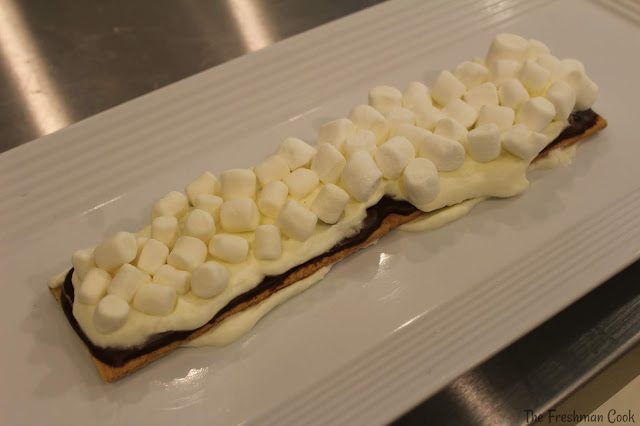
Spread the chocolate with more whipped cream, and then top the whipped cream with mini marshmallows.
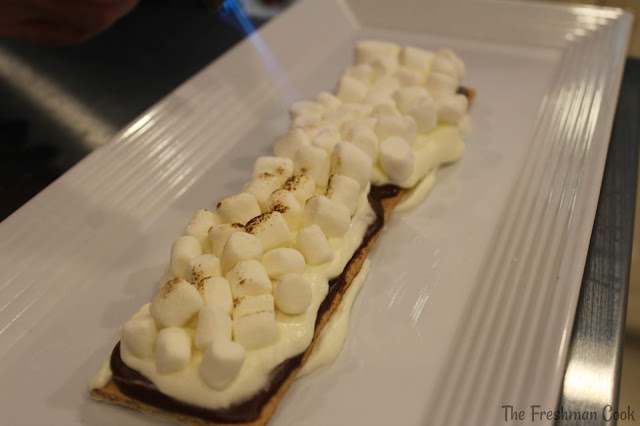
Use a kitchen torch to toast the marshmallows.
Start the next layer by placing 2 more graham crackers on the top of the toasted marshmallows.
Spread more chocolate over the graham crackers.
Add more mini marshmallows to the top of the chocolate, and toast them. Place the graham crackers on top of the marshmallows. Although I used whipped cream in the bottom layer, it’s not really necessary for the top layer.
Spread whipped cream over the entire cake. Wrap the cake in plastic and refrigerate overnight. You can see that I do not have enough whipped cream on the cake. That is because I ran out of whipping cream late in the evening. So I wrapped the cake in the plastic until the next morning when I went to buy more whipping cream. I made more whipped cream, covered the cake and placed it back into the fridge. It had already softened from being in the fridge overnight, but the added whipped cream made the cake much prettier!
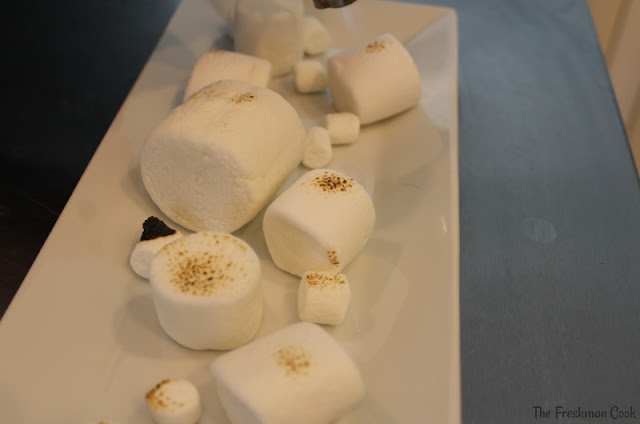
Use a separate plate to toast the marshmallows for the top of the cake. Set aside.
Place two graham crackers in a plastic bag and roll a rolling pin over the crackers to crush them into fine crumbs.
Sprinkle the graham cracker crumbs over the cake and onto the plate. Drizzle more ganache over the cake and the plate. Place the marshmallows that were toasted earlier onto the cake!
Enjoy!
Thank you for joining me today! I am so happy that you stopped by! I joined some blogger friends today, who are also sharing no bake recipes! Keep scrolling down the page to find their yummy recipes!
 We share Recipes From Our Dinner Table!
Join our group and share your recipes, too! While you’re at it, join our Pinterest board, too! 

- 3 cups Heavy Duty Whipping Cream
- 4-6 tablespoons Sugar
- 8 Graham Crackers
- 12 ounces Milk Chocolate ( I use Trader Joes Belgium Chocolate Bar) It is very tasty and is priced great. Give it a try. You will love it)
- Bag of mini Marshmallows
- Large and medium Marshmallows
- Make the whipped cream by pouring the heavy whipping cream into a large bowl. Start mixing on medium speed. As the cream starts to thicken, add the tablespoons of sugar. If you would like it less sweet, start with a small amount and then mix. Add more after tasting and mix again, if needed.
- Melt the chocolate over low heat, using a double boiler. If you do not have one, you can make your own by placing chocolate into a small pot. Place some water into another pot, which should be about one size larger than the pot with the chocolate. The small pot should not touch the water in the bottom pot, but it needs to allow the heat from very low temperature to melt the chocolate. After the chocolate is melted, heat some heavy duty whipping cream in a separate pan or the microwave. Add the heated cream to the melted chocolate, stirring the chocolate and cream together, creating a chocolate ganache.
- Use a plate to build the cake on that you can also use as a serving platter. It is much easier for you. Moving the finished cake could be a problem. Spread whipped cream on one side of two graham crackers. Place them on a plate, whipped cream side down on the plate. This will help stabilize the graham crackers.
- Spread the melted chocolate on to the top of the graham crackers.
- Spread the chocolate with more whipped cream, and then top the whipped cream with mini marshmallows.
- Use a kitchen torch to toast the marshmallows.
- Start the next layer by placing 2 more graham crackers on the top of the toasted marshmallows.
- Spread more chocolate over the graham crackers.
- Add more mini marshmallows to the top of the chocolate, and toast them. Place the graham crackers on top of the marshmallows. Although I used whipped cream in the bottom layer, it’s not really necessary for the top layer.
- Spread whipped cream over the entire cake. Wrap the cake in plastic and refrigerate overnight. You can see that I do not have enough whipped cream on the cake. That is because I ran out of whipping cream late in the evening. So I wrapped the cake in the plastic until the next morning when I went to buy more whipping cream. I made more whipped cream, covered the cake and placed it back into the fridge. It had already softened from being in the fridge overnight, but the added whipped cream made the cake much prettier!
- Use a separate plate to toast the marshmallows for the top of the cake. Set aside.
- Place two graham crackers in a plastic bag and roll a rolling pin over the crackers to crush them into fine crumbs.
- Sprinkle the graham cracker crumbs over the cake and onto the plate. Drizzle more ganache over the cake and the plate. Place the marshmallows that were toasted earlier onto the cake!
- Enjoy!
s’mores, no bake cake, chocolate, marshmallows, graham crackers
desserts, cake, no bake
dessert


