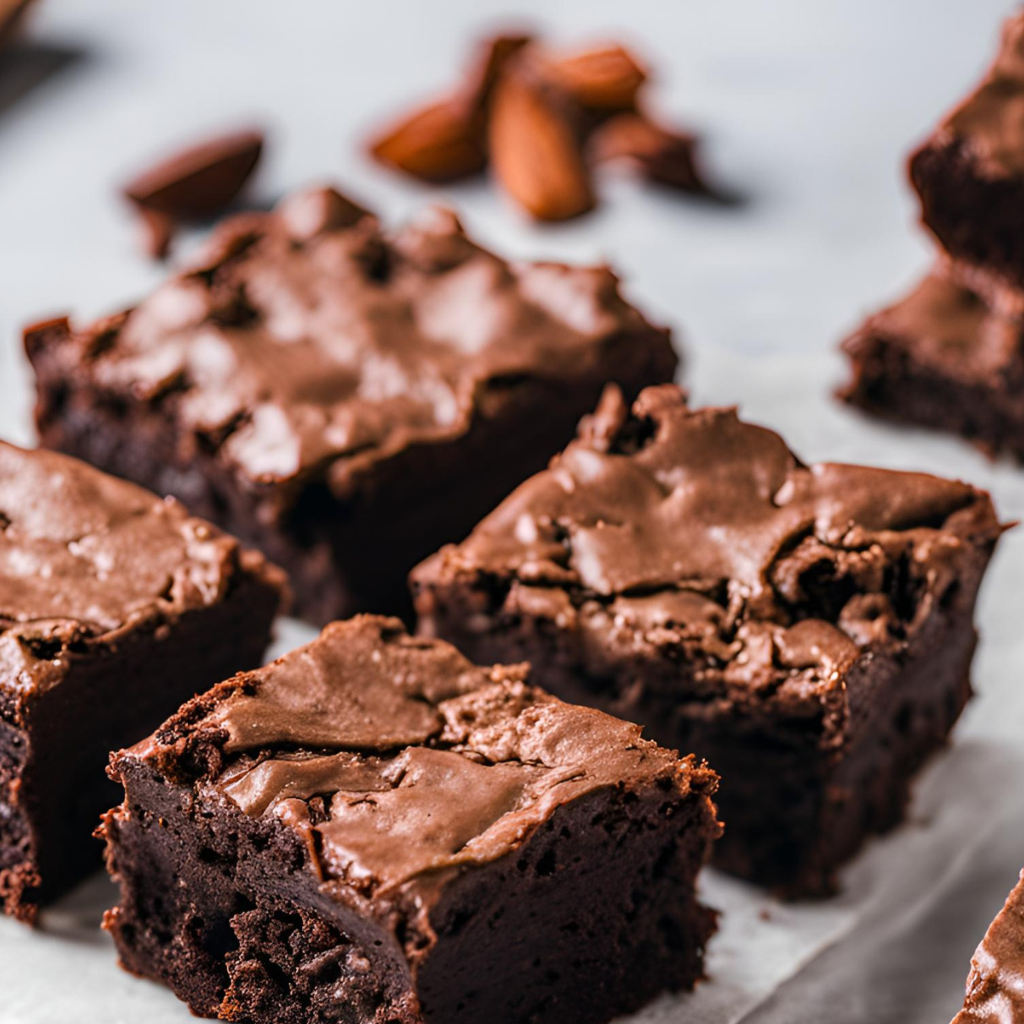
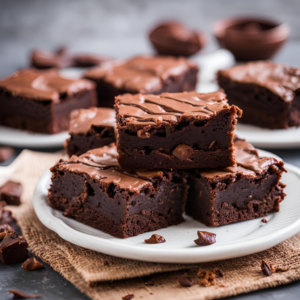
Raw Vegan Brownies are a sweet and nourishing treat that redefines indulgence with wholesome ingredients. This delightful recipe brings together rich, fudgy textures and deep chocolate flavors, all while keeping things naturally sweet and entirely plant-based.
Crafted without any baking, these brownies are made from a blend of raw nuts, dates, and cacao, resulting in a dessert that’s as satisfying as it is nutritious. Simply blend, press into a pan, and chill for a guilt-free delight that’s ready to enjoy. Perfect for health-conscious dessert lovers, these brownies offer a luscious experience that’s both rich and refreshing.
Each bite delivers a smooth, melt-in-your-mouth texture paired with the pure flavor of chocolate similar to rich Slutty Brownies or a creamy Chocolate Chip Brownie Cheesecake. Whether you’re sharing them at a gathering or indulging in a cozy moment at home, Raw Vegan Brownies are sure to elevate your dessert repertoire with their irresistible taste and healthful ingredients.
Raw Vegan Brownies
Equipment
- Food processor
Ingredients
Brownies
- ¼ tsp sea salt
- 1½ cups raw walnuts
- 2 tbsp cacao nibs
- 1 cup raw almonds
- ¾ cups raw almonds
- 2½ cups dates
Ganache
- 2 tbsp coconut oil
- ¼ cup almond mil
- ¼ tsp sea salt
- 1 cup dairy-free dark chocolate
- ¼ cup powdered sugar
Instructions
- In a food processor, blend 1 cup of walnuts (or 2/3 of the total if altering) with the almonds until finely ground.
- Add cacao powder and sea salt to the nut mixture, then pulse to combine.
- Set aside.
- Blend the dates until they form small bits, remove and set aside.
- Return the nut-cacao mixture to the processor.
- Gradually add small handfuls of date pieces, processing until a dough forms.
- If it doesn’t hold together when squeezed, add more dates.
- Press the dough into a parchment-lined 8×8 dish.
- Mix in 1/2 cup chopped walnuts and cacao nibs before pressing flat.
- Mix in 1/2 cup chopped walnuts and cacao nibs before pressing flat.
- Chill in the freezer or fridge for 10-15 minutes.
- Heat almond milk and pour over chocolate.
- Let it sit for 2 minutes, then stir in melted coconut oil and a pinch of salt.
- After cooling in the fridge for 10 minutes, whisk in powdered sugar until fluffy.
- Frost the brownies and top with extra walnuts and cacao nibs.
- Slice into 12 squares and enjoy!
Notes
- If the brownie dough feels too dry or crumbly, gradually add more dates until it holds together when pressed.
- For a simpler topping, skip the ganache and dust the brownies with cocoa powder or drizzle with melted dark chocolate for a quick finish.
Nutrition Facts:
| Nutrition | Value |
|---|---|
| Calories | 390 kcal |
| Carbohydrates | 44 g |
| Protein | 9. 4g |
| Sugar | 31 g |
Frequently Asked Questions (FAQs)
Can I use different nuts?
Yes! You can substitute walnuts and almonds with other nuts like pecans or cashews, but keep in mind that it may alter the flavor slightly.
How can I make these brownies sweeter?
If you prefer a sweeter brownie, add more dates or a drizzle of maple syrup into the mixture until you reach your desired sweetness.
Are these brownies gluten-free?
These Raw Vegan Brownies are naturally gluten-free, making them a great option for those with gluten sensitivities.
Can I make these brownies nut-free?
Yes, you can use seeds like sunflower or pumpkin seeds in place of nuts, but the texture and flavor will change slightly
How do I store leftover brownies?
Keep the brownies in an airtight container at room temperature for 3-4 days, or freeze them for up to 1 month for longer storage.